Understanding the Role of a Garage Door Bracket
First and foremost, before we delve into fixing a broken garage door bracket, it's crucial to understand what it is and the role it plays in the overall functionality of your garage door. The garage door bracket, also known as the top fixture or top bracket, is a piece of metal that connects the garage door to the garage door opener. It is pivotal in the movement and secure closing of your garage door. A malfunctioning or broken bracket can lead to serious issues with your garage door, making it imperative to fix it promptly.
Identifying the Problem with Your Garage Door Bracket
The second step in this process is identifying the issue with your garage door bracket. This could range from the bracket being loose, bent, or completely broken. If your garage door isn't closing properly, creating unusual noises, or if it's visibly off balance, the issue may lie with the bracket. Diagnosing the problem accurately is crucial in determining the best way to fix it. Always remember, safety first. Make sure to disconnect the power to your garage door opener before inspecting the bracket.
Gathering the Necessary Tools
Once you've identified the issue with your garage door bracket, the next step is to gather all the necessary tools to fix it. These tools may include a set of screwdrivers, a wrench, pliers, and a new garage door bracket if the old one is beyond repair. Having the right tools at hand will save you time and frustration during the repair process. Also, ensure you have a sturdy ladder to safely reach the garage door bracket.
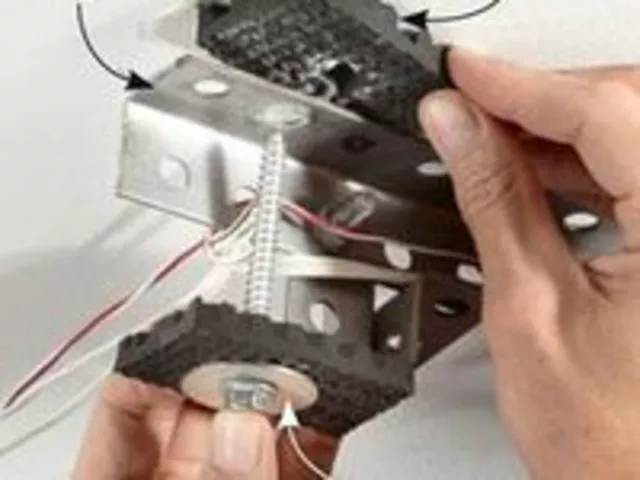
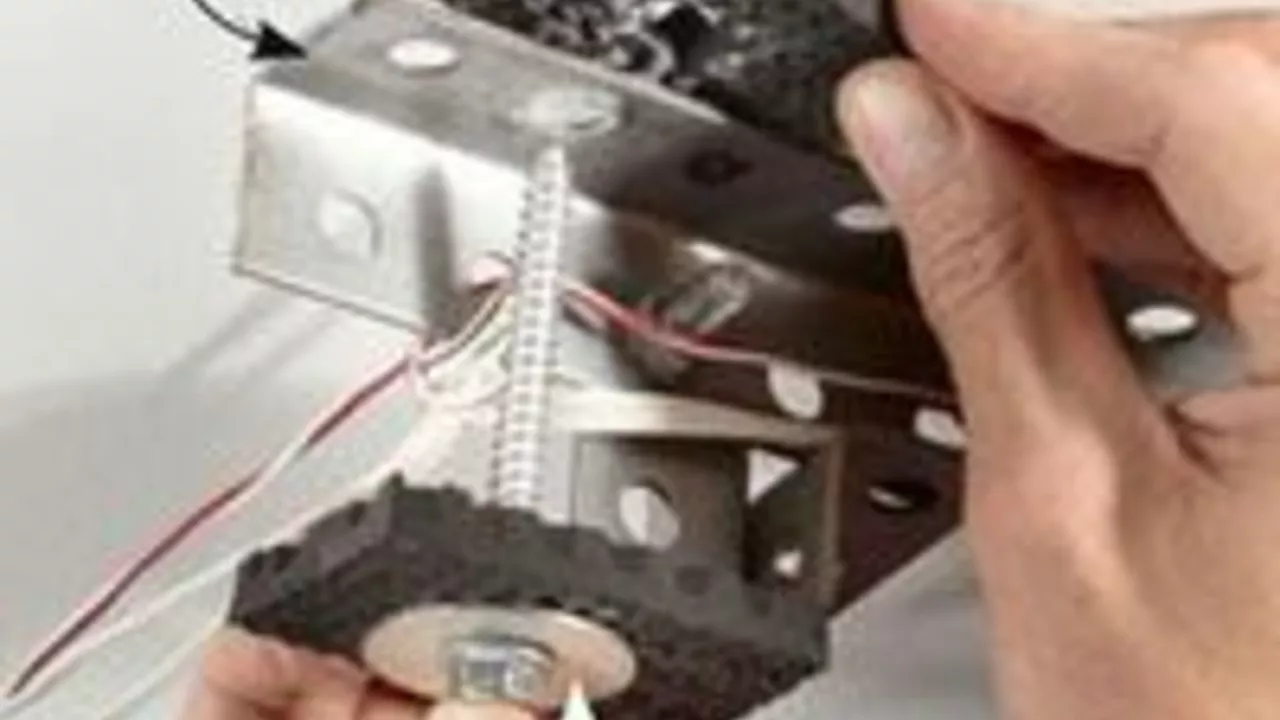
Removing the Old Garage Door Bracket
With the right tools in hand, it's time to remove the old or damaged garage door bracket. Start by loosening the bolts that attach the bracket to the garage door. Be careful not to let the bracket fall once the bolts are loosened. Once the bracket is removed, inspect the area for any further damage. If the bracket was severely damaged, there may be additional issues to address.
Installing the New Garage Door Bracket
After removing the old bracket, the next step is to install the new one. Align the new bracket in the same position as the old one and start by hand tightening the bolts. Once the bolts are partially secured, you can use your wrench to fully tighten them. Ensure the bracket is securely fastened to the garage door to prevent any further issues. Remember, the garage door bracket plays a crucial role in the operation of your garage door, so it's important to install it correctly.
Testing the Newly Installed Bracket
The final step in this process is to test the newly installed garage door bracket. Reconnect the power to your garage door opener and operate the door a few times to ensure everything is working correctly. Listen for any unusual noises and observe the movement of the door. If everything runs smoothly, congratulations, you've successfully fixed your garage door bracket. If you encounter any issues, it's recommended to contact a professional garage door repair service for further assistance.